


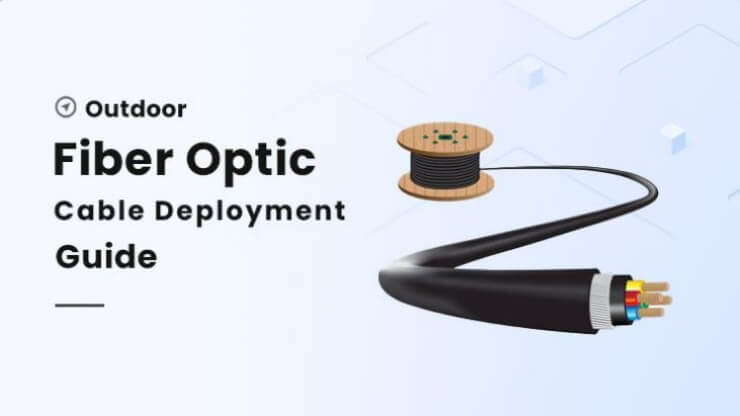
How to Install Outdoor Fiber Optic Cable: Tips and Best Practices

In today’s era of high-speed connectivity, a stable and reliable network is like the lifeline of a city. Outdoor fiber optic cables serve as the key medium to carry massive amounts of data across complex environments. Unlike indoor environments, outdoor cables are constantly exposed to challenges such as rain, wind, ultraviolet radiation, extreme temperature fluctuations, and even threats from rodents. The quality of installation directly determines the performance and service life of the network. An improper installation may lead to signal attenuation and frequent interruptions at best, or costly repairs and even safety hazards at worst. Therefore, understanding the characteristics of outdoor fiber optic cables and mastering proper installation methods is crucial. This article will provide an in-depth analysis of outdoor cable types, key selection criteria, core installation steps, critical precautions, as well as subsequent testing and maintenance guidelines, helping you build a robust and durable outdoor optical communication link.
What Is Outdoor Fiber Optic Cable?
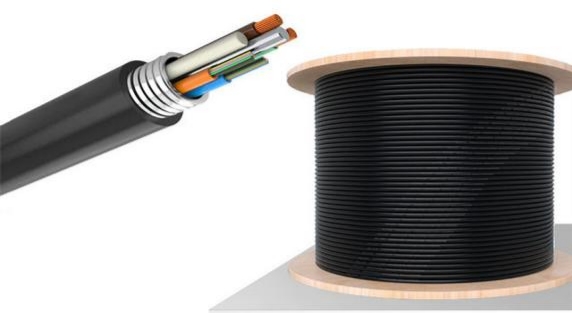
Outdoor fiber optic cable is a type of communication cable specifically designed for harsh outdoor environments. At its core, the optical fibers are enclosed within protective layers that are resistant to pressure, water, and ultraviolet radiation. Compared with indoor fiber optic cables, outdoor cables must withstand exposure to rain, temperature fluctuations, mechanical stress, and biological damage, ensuring stable signal transmission across complex terrains. They serve as a critical medium for outdoor fiber installation projects such as metropolitan area networks, base station interconnections, and smart city infrastructures.
Types of Outdoor Fiber Optic Cables
Outdoor fiber optic cables are mainly classified into the following three categories based on installation methods and protection levels:
| Type | Applicable Scenarios | Core Protection Design | Keyword Characteristics |
| Direct buried optical cable | Directly buried underground | Double sheath + steel tape/aluminum armor | Pressure-resistant, moisture-proof, and rodent-proof |
| Pipeline optical cable | Inserting into pre-buried pipes | Smooth HDPE outer skin + water-blocking material | Low friction, chemical resistance |
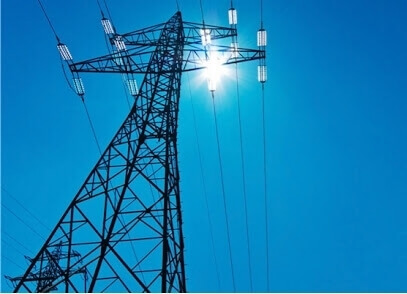
| Overhead optical cable | Hanging on a utility pole/tower | Built-in aramid reinforcement + UV protection sheath | High tensile strength, windproof and UV resistant |
Special Types:
Submarine Cable: Features multi-layer metal armoring and sealing gel, designed for crossing rivers and lakes.
Anti-Ant Cable: Incorporates insect-repellent agents such as capsaicin into the sheath, suitable for areas with frequent ant infestations.
How to Choose the Right Outdoor Fiber Optic Cable?
Selecting the right outdoor fiber optic cable requires a balance between environment, mechanical performance, and cost. Pay close attention to the following five aspects:
- Installation Method Determines the Type
Direct Burial: Choose armored cables, e.g., GYTA53
Duct Installation: Choose non-metallic strength member types, e.g., GYXTW
Aerial Installation: Choose self-supporting ADSS or figure-8 cables
- Environmental Resistance
Temperature Range: -40℃ ~ +70℃
Moisture Protection: Water-blocking gel + aluminum-plastic composite tape
UV Protection: Black HDPE sheath with UV resistance
- Mechanical Performance Indicators
Tensile Strength: Aerial cables should withstand >6000N
Crush Resistance: Direct-buried cables should withstand >3000N/10cm
Bending Radius: At least 20x cable diameter during installation to prevent micro-bending loss
- Fiber Characteristics Matching
Single-mode: For long-haul backbone networks
Multi-mode: For short-distance access
Fiber Count Planning: Reserve 30% spare capacity (e.g., if 24 cores are needed, choose 32 cores)
- Cost and Certification
Compliance: Meets international standards such as IEC 60794, Telcordia GR-20
Cost-effectiveness: For duct installations, non-armored cables can reduce costs
Outdoor Fiber Optic Cable Deployment Guide
Core Installation Steps
- Step 1: Route Preparation and Environmental Treatment
According to the laying method, operations differ: Excavate a trench with a depth ≥60cm; in frozen soil areas, the trench should be deeper. Lay a 10cm fine sand cushion at the bottom, and avoid sharp stones; Clear the duct with a rod before laying, pre-install a pulling rope, and apply silicone grease to reduce friction; Survey the pole span, install hoop steel bands and suspension fittings on the poles, and reserve a 0.5% sag to prevent wind-induced swinging;
- Step 2: Cable Pulling and Laying
Cable pulling is the high-risk stage of installation. A tension controller must be used throughout to monitor the pulling force, and it is strictly forbidden to exceed the cable’s rated maximum tensile strength. The pulling speed should be kept ≤15m/min. When using mechanical pulling, a swivel connector should be used to eliminate torque, and guiding pulleys should be used when passing through corners.
- Step 3: Splicing and Terminal Sealing
The quality of splicing generally determines the degree of signal attenuation. Splicing must be carried out inside a splice closure, with ambient humidity below 70%. Use alcohol wipes and lint-free paper to clean the fibers. The discharge parameters of the fusion splicer must match the fiber type. Use a heat-shrink sleeve to protect the splice, ensuring the splice point is positioned at the center of the clamp plate. At the same time, waterproof sealing is required: apply sealant and use heat-shrink tubing for dual-layer treatment at the entry and exit ports of the closure, and fill waterproof gel into the closure up to 80% of its volume.
- Step 4: Securing and Slack Management
For direct burial, first cover the cable with 30cm of fine soil, lay a warning tape, and then perform layered compaction mechanically. For aerial segments, fasten the cable at each pole span with stainless steel straps, avoiding direct friction between the cable and metal parts. At splice points, leave a figure-eight slack coil with a length ≥3m to facilitate future maintenance.
Key Points to Note
- Uncontrolled Mechanical Force
If the tensile force exceeds 80% of the cable’s tensile strength, it may cause micro-bending or fiber breakage, which may initially pass testing but result in soaring attenuation after several months. Heavy vehicle rolling over directly buried cables or compression inside conduits may also lead to sheath deformation.
- Insufficient Bending Radius
In static conditions, the minimum bending radius should be ≥20 times the cable diameter. Forcing a sharp bend will cause macrobending loss.
- Waterproofing Failure
If the sealing gel inside the splice closure is not fully filled into the gaps, groundwater may seep in and dilute the water-blocking gel inside the loose tube, eventually causing fiber corrosion and breakage.
Post-Installation Testing and Maintenance Guidelines
After installation, reliable verification testing is very important, and the testing part can be divided into three stages: basic verification, quantitative verification, and advanced testing.
Basic verification should be carried out in real time during construction, and a VFL (Visual Fault Locator) can be used to inject visible red light into one end of the fiber and observe whether light passes through at the other end. This method can quickly locate a breakpoint or macro bend within 5km, with low cost but only limited to basic judgment.
The second stage should be performed after project completion, conducting end-to-end loss testing. A stable light source is used to transmit signals, and the optical power at the receiving end is measured by an optical power meter, ensuring that the optical attenuation is within a controllable range.
Advanced testing is a necessary verification to ensure high reliability. This part usually requires professional operation or guidance, and OTDR traces can be used to precisely locate fault points, thereby evaluating splice quality and identifying potential micro-bending risks.
Long-term maintenance is the key to ensuring the service life of outdoor optical cables. A regular inspection once per quarter is required to check their physical condition, including whether exposed cables have sheath scratches or compression deformation, whether aerial cables show hardware corrosion, and whether sag between poles has abnormally increased. In addition, it is necessary to pay attention to environmental risk prevention, regularly performing sheath maintenance such as waterproofing, anti-rodent, and anti-corrosion protection.
Frequently Asked Questions(FAQ)
Q: Can indoor optical cables be directly used outdoors as a substitute? What are the risks?
A: Absolutely prohibited. Indoor optical cables lack UV protection layers (typically PVC sheaths), which become brittle and crack after outdoor exposure. More critically, they lack water-blocking structures (no water-blocking yarn or filling compound), so rainwater infiltration will cause fiber hydrogen loss (attenuation peak exceeding 3dB/km at 1420nm). Correct practice: professional outdoor optical cables with black HDPE sheaths and moisture barriers must be used.
Q: How to handle emergency situations if an optical cable sheath is bitten open by squirrels?
A: First, cut off the cable sections on both sides of the damaged point and strip the affected sheath. Wrap the exposed loose tube with multiple layers of waterproof tape and heat-shrink tubing. Complete formal splicing within 48 hours. In areas with active animals, wrap stainless steel spiral sheaths or install rodent-proof conduits.
Share on Social:


- PREV: Understanding the Eye Diagram in Optical Transceiver Testing
- NEXT: Null